Artistic Camo, Trying a different camouflage idea
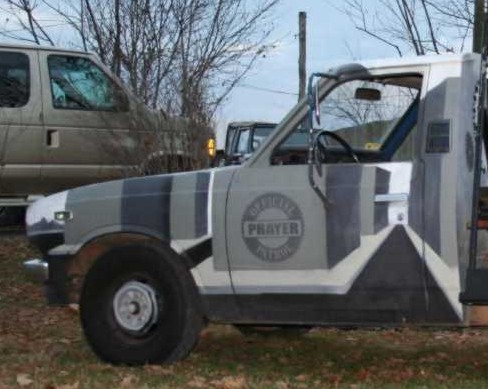
This is my 1978 Toyota truck. I'm still driving it, but it now has an entirely different paint scheme. This was the primer stage. For years, I had wondered if it was possible to create an urban camouflage. I'm not sure how successful this is, I guess the only way to know is to park it in the city, and see if anybody accidently runs into it. At any rate, I was really pleased with how it looked.

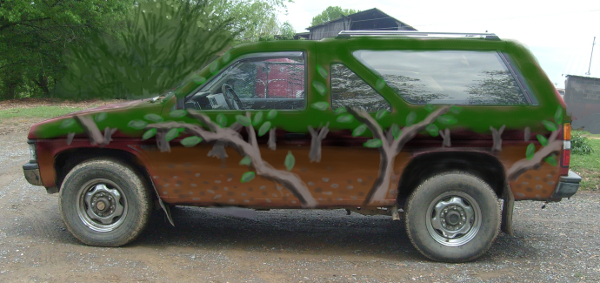
As I understand it, a camouflage scheme is supposed to break up the contour of the vehicle. What I tried to do here is break up the surface of the vehicle. This was all done with primer spray cans, and some spray white. Each store has its own variation of gray, just buy 4 of those, and a black. No masks were used with this, save for the Prayer Patrol logo. I used a metal straight edge to get the lines and edges. I live in a wooded region, and started wondering about the colors deep in the forest, as I was driving around. Is that off black in the shaded area? Dark gray? Dark brown? Brown-gray? Then I started wanting to experiment with camouflage again. Idon't think I was as successful this time, but you be the judge.

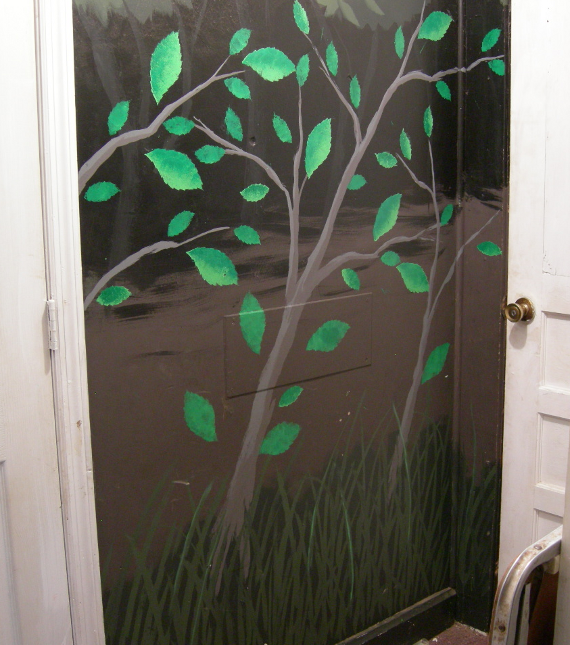
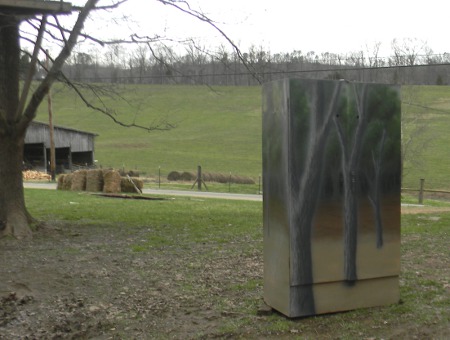
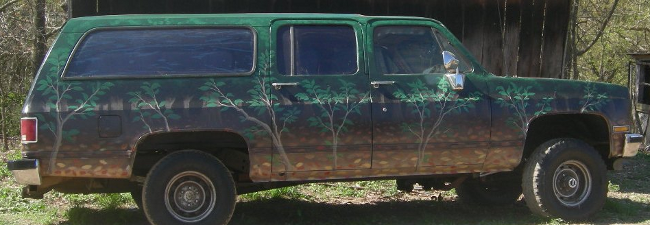
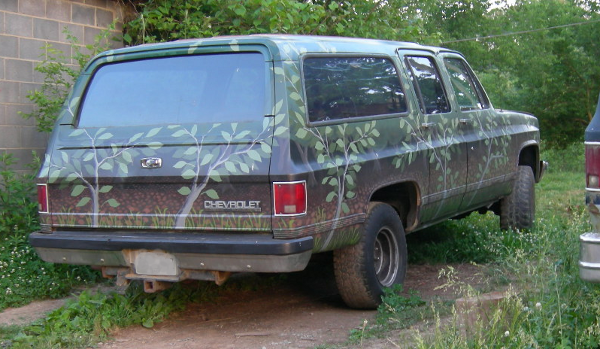
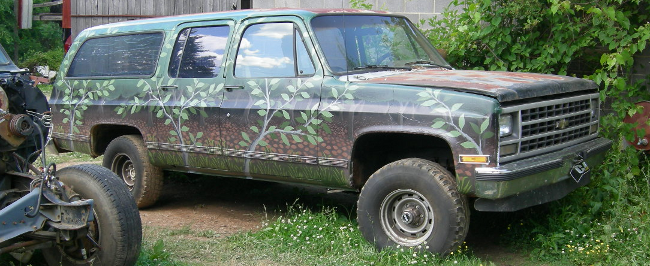
I didn't initially have a vehicle to experiment with, so I tried other mediums. Once again, the idea is to draw the viewer's attention through the surface. This is attempted with the deep dark region of the forest scene. The ground below the trees gets little sunlight, so it has sparce growth. This dirt gets lighter in color as it gets nearer to the viewer, and nearer the edge of the tree cover. Also quite handy for the look of depth. Grass at the lower edge of the surface is a nice addition. The colors used in the background parts are duller, tertiary plus gray colors. The more foreground parts are more vibrant colors. The angular lines of the nearer small trees cut across the more sedate square angles of the forest behind. The painting at left is a small hallway in our house. Hey, I needded someplace to practice!
Then I got my first Wacom Tablet. Below is a quick test of the art camo idea on a Nissan Pathfinder. Even though it was executed quickly, I think it's the best representative of the idea. That and maybe it shows that softer overspray edges are better than crisper brush painted edges.
Finally! A real vehicle to experiment with. Mind you, this is a weekend project. Weird neighbor, yes, obsessing over art idea, maybe, but I confine my efforts to Saturday.

Above you see my first try, on a Chevrolet Suburban. I wasn't paying close enough attention, and made the last stage (small foreground trees) too small. Also, some of the other colors aren't right. There is another aspect of this project, that is to use all non spray equipment. There are new envireonmental regulations regarding the use of spray equipment. I want to come up with ideas that a redneck can use to make his or her vehicle look cool, and still not violate any regulations. I also learn some new tricks along the way. The dirt colors are all done with a 4 inch wide deep nap roller, and I'm very pleased with the results. I expected much less, as I thought the volume of paint remaining in that type of roller cover would cause streaks into the adjacent color. Not so.

Here is my second try. The first one had too delicate of a look. The second one isn't much better, but to really make my point, imagine a bunch of white blossoms on the foreground trees of the first one. Something for Lady Redneck. Even without the flowers, it looks like a pretty dress that a woman would wear. Hence the push to re-do the project.
My second, and maybe last attempt, from the side. I guess I didn't add enough flattening paste; the colors are distorted by the glare. If you're thinking of doing you're own camo paint job, I hope this helps, remember to learn some stuff about color mixing, and use gray as an additional way to dull a color. I think my next experiment might be to see if I can get a dented up vehicle to look like a rough rock surface...as with all these artistic paint schemes, no bodywork required!
Home Page